

Learning how to use a treadmill is less about finding the perfect speed and more about making the machine predictable before your feet have to keep up with it.
A first treadmill session can feel oddly crowded: a console full of buttons, a belt that moves beneath you, and a handrail that suddenly looks more inviting than it did in the showroom. This treadmill guide for beginners follows the whole journey – choosing a machine, setting it up, starting safely, reading your body, making indoor runs easier to repeat, and knowing when the machine needs care rather than another mile.
The central rule of treadmill safety for beginners is simple: check first, start slowly, and stop early when anything feels wrong. Your exact model’s owner’s manual always takes priority for clearance, electrical supply, folding, belt adjustment, lubrication, and maintenance.
- Choose for the runner, room, and real weekly use.
- Learn Stop and the safety key before adding speed.
- Treat new symptoms or machine faults as reasons to stop.
A beginner-friendly treadmill is not the machine with the most impressive console. It is the one that makes starting, moving, and stopping feel predictable.
Five requirements a treadmill must meet
-
Usable running space
The belt must suit the runner’s natural stride and the movement the manufacturer says the machine can handle.
Look forPublished belt dimensions and intended useAvoidChoosing by maximum speed alone -
Stable capacity
The weight limit, frame, rails, and deck should support the largest regular user with a sensible margin.
Look forClear manufacturer limits and warranty termsAvoidTreating the maximum limit as a daily target -
Safe home placement
The open space, floor, ceiling, outlet, and route onto the machine must match the model’s instructions.
Look forMeasured running and folded footprintsAvoidPlanning the room from product photos -
Controls within easy reach
Start, Stop, speed, incline, side rails, and the safety key should be simple to identify and operate.
Look forA calm in-person or return-window testAvoidEssential controls hidden behind menus -
Support after delivery
Assembly guidance, permitted maintenance, parts, service, and return terms matter after the first week.
Look forA usable manual and reachable supportAvoidA bargain with no practical service path
Understand the machine before comparing features
Manual treadmill
The runner’s movement drives the belt. Starting resistance and belt behavior vary widely, so it should be tested rather than judged by size alone.
Motorized treadmill
An electric motor moves the belt at a selected speed. It requires model-approved power, clearance, maintenance, and safe access to the controls.
Usable belt area
The walking or running surface available for foot placement. It matters more than the machine’s full outside dimensions.
Safety key
A removable emergency-stop device clipped to clothing during use. It is a backup and does not replace a normal controlled stop.
Incline
The deck angle that changes effort and lower-leg demand. Beginners should change it gradually and avoid increasing speed at the same moment.
Belt drift and slip
Drift is sideways movement toward one edge; slip is hesitation underfoot. They are different symptoms and should not be corrected by guesswork.
Choose a treadmill that fits real life
Begin with the largest person who will regularly use the treadmill. Compare the published user-weight limit, usable belt width and length, handrail position, step-up height, and intended use. A generous maximum speed means little if the deck feels cramped or the machine is described mainly for walking. Leave a reasonable margin below the stated weight limit rather than treating it as a daily target; this guide to matching treadmill capacity to the runner explains why that number must be read alongside deck size, stability, intended use, and warranty coverage.
Decide between manual and motorized
A manual treadmill moves because the runner moves the belt. It usually has no powered speed control and may require more effort to start and keep moving. A motorized treadmill controls belt speed for you, making gradual changes and steady walking or running easier to reproduce. Neither type is automatically better: the useful question is whether the starting resistance, speed control, deck, stability, and safety features suit the intended runner.
Try both types before buying if possible. A compact manual model that feels clever in an advertisement may feel awkward underfoot, while a motorized machine may require more floor space, electrical planning, and maintenance. The distinction matters far more than a row of preset workouts.
Judge a low price by what it can safely do
A treadmill under $500 can be useful for walking or occasional light jogging, but price alone cannot tell you whether it can handle regular running. Read the manual, warranty, motor and belt information, return terms, and the manufacturer’s intended-use language. Look for stable rails, a belt long enough for the runner’s natural stride, controls that are easy to reach, and service support that still exists after the delivery van leaves.
Include the whole cost: delivery, assembly, floor protection, permitted maintenance supplies, and any membership needed for features you care about. Some treadmills work perfectly well in manual mode without a subscription; others reserve workouts, routes, or detailed metrics for paying members. Before buying, check what works without a subscription after the trial ends. A treadmill should not become a very large coat rack merely because its screen developed a monthly appetite.
Measure the machine in both positions
For a folding treadmill, compare the running footprint, folded footprint, ceiling height, and the clearance needed to raise and lower the deck. Folding solves storage, not stability, noise, or running-space problems, especially when choosing one for an apartment. Check the locking mechanism and confirm that one person can safely manage it as the manual describes. If the machine must be unfolded, shifted, and plugged in before every run, that small ritual may decide how often it is actually used.
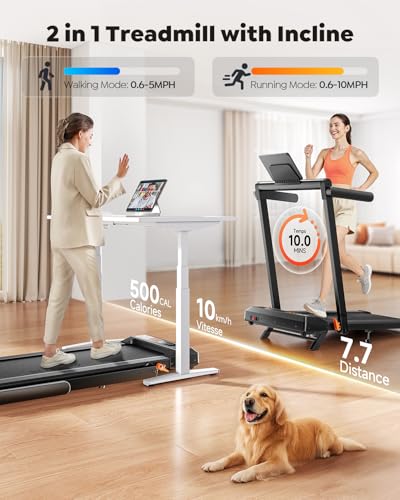
Give the treadmill a safe place at home
Start with clearance and a level base
Use the owner’s manual to find the required open space around the machine, especially behind the belt. That rear landing area is not spare storage for boxes, dumbbells, or a laundry basket; it is where a person may need to step or slide off. Leave enough side clearance to mount and dismount without squeezing past furniture, and check overhead space if the deck inclines.
Place the treadmill on a firm, level surface. If it rocks, slides, or twists underfoot, stop and correct the setup using only the manufacturer’s leveling method. A suitable equipment mat may protect flooring, catch dust and sweat, and reduce some vibration transmitted through the floor, but what a treadmill mat protects depends on the surface and the source of the vibration. It cannot guarantee a quiet room, cure mechanical noise, or stabilize an incorrectly assembled machine.
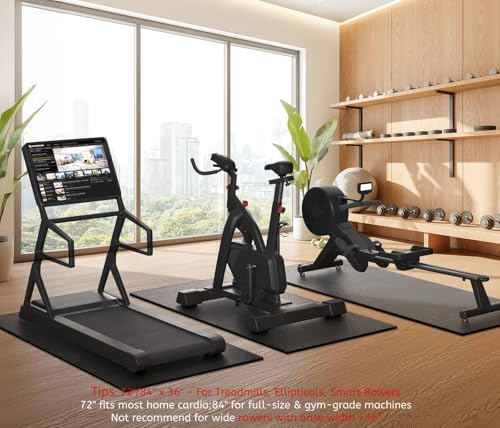
Plan power, airflow, and shared walls
Follow the manual’s electrical requirements exactly. Many treadmills need a properly grounded outlet and should not share an overloaded circuit; do not assume an extension cord or ordinary power strip is acceptable. Keep the cord away from the belt and walking path, and never use a damaged plug or cable. If a breaker repeatedly trips, unplug the machine and arrange qualified service instead of resetting it until it agrees to cooperate.
In an apartment, placement often matters more than advertised motor noise. Footfalls can travel through hard floors and structural framing, so reducing apartment treadmill noise begins with identifying whether the problem is motor sound, footfall impact, or vibration. Avoid a shared bedroom wall where possible, use considerate hours, and test the sound in the room below. This second part of the beginner treadmill setup also needs comfortable airflow and a room that does not become excessively hot during use.
Loose rugs, stacked boards, makeshift shims, overloaded outlets, and an extension cord chosen by guesswork can turn a setup problem into a fall or electrical hazard. Use the model-specific instructions or qualified help.
Learn the controls before adding speed
Practice one calm start and stop
-
Read the model’s start-up instructions
Locate Start, Stop, speed up and down, incline controls, the side rails, and the emergency-stop area before switching on.
-
Insert and clip the safety key
Stand on the side rails, insert the key fully, and attach the clip securely to your clothing before the belt begins moving.
-
Start at the lowest speed
Keep both feet on the side rails and let the empty belt move for a moment. Watch and listen for anything unexpected before stepping on.
-
Step onto a steady belt
Hold the rails lightly, place one foot and then the other near the middle of the belt, and match an easy walking pace.
-
Rehearse the ordinary stop
Reduce speed or press Stop, hold the rails, and step onto the side rails when it is safe. Wait for the belt to become completely still before stepping away.
The safety key is a backup, not the normal finish button. Keep it clipped for every session and never bypass it.
The clip must stay attached to clothing throughout the session, with enough cord to move normally but not so much that it cannot pull free during a fall. Reviewing how to use the treadmill safety key explains where to stand, how to test it without running, and why it never replaces an ordinary controlled stop.
Let control choose the first speed
There is no universal beginner treadmill speed. Start with an easy walk and increase in small steps only while your feet land comfortably near the middle of the belt, your posture stays upright, and you can operate the controls without panic or overreaching. If you need to grip the rails, shorten your stride, or chase the belt, the setting is too demanding for that moment.
The console’s miles per hour describes speed; pace describes how many minutes it takes to cover a mile. As speed rises, minutes per mile fall; understanding treadmill pace in MPH helps translate the display without choosing a number merely because it “looks like running.” Console distance and pace are useful machine estimates, not a verdict on the runner.
Add incline without borrowing balance
Zero treadmill incline is a valid setting, especially while learning the belt and controls. Incline increases effort and changes how the calves and legs work, so adjust speed or incline—not both at once—and allow time to settle. Using treadmill handrails is appropriate during mounting, dismounting, and a brief loss of balance; they are not meant to carry body weight through the session. Persistent gripping is a signal to reduce the demand.
A phone or tablet holder may make a steady indoor session easier to follow, but it must not cover Stop, speed, incline, the safety key, or your view of the belt. Secure it before the machine starts. Never reach across the console or adjust a loose screen while walking.

Stop safely when your body feels wrong
Respond to dizziness before diagnosing it
If you feel dizzy, faint, unusually unsteady, or as if the room is moving, reduce speed or press Stop while holding the rails. Step onto the side rails when it is safe to do so; do not jump from a moving belt. Use the safety key if you cannot make a controlled stop, remembering that the belt may slow abruptly. Once safely off, sit or lie down somewhere stable and do not restart simply because the feeling passes.
Feeling dizzy on a treadmill can have many causes, including heat, dehydration, medication effects, low blood pressure, illness, or a condition that needs medical care. The treadmill display cannot diagnose it. Repeated, severe, or unfamiliar dizziness warrants medical advice before another session; fainting or near-fainting deserves prompt evaluation.
Treat an unexpected heart-rate reading as one clue
A console or wrist sensor may show a heart rate that seems surprisingly high. First slow down and assess how you feel; the guide to unexpected treadmill heart rate separates sensor limitations from symptoms that need attention. Poor sensor contact, arm movement, heat, stress, caffeine, medication, illness, and actual exertion can all affect the number, so do not diagnose the cause while the belt is moving. Stop if the reading remains unusual or comes with chest discomfort, marked breathlessness, palpitations, weakness, or dizziness.
Chest pain or pressure, fainting, severe shortness of breath, sudden confusion, or symptoms that feel like an emergency require immediate local emergency help. The American Heart Association’s warning signs include chest discomfort, shortness of breath, and lightheadedness. Less dramatic symptoms that recur still deserve a conversation with a healthcare professional before treadmill use resumes.
Good treadmill safety for beginners does not require you to identify the cause mid-run. Make the belt slower, reach the side rails safely, and get the right help after you are stable.
Make indoor running easier to return to
Let indoor effort feel different
Treadmill and outdoor running feel different because outdoor routes bring wind, turns, slopes, changing surfaces, and natural shifts in pace, while the belt keeps a steady rhythm and the room offers fewer visual cues and less airflow. That does not make one setting universally easier. It explains why the same displayed pace can feel smoother one day and strangely demanding the next.
Use breathing, posture, and control alongside the speed display. A fan or open window may make the room more comfortable, but aim airflow so it does not blow dust into the console or make you reach across moving parts. A fan changes comfort; it does not prove that a harder pace is safe.

Give each repeat run a small purpose
Boredom is not a character flaw; a fixed view simply gives the mind less to process. Practical ways to make treadmill time less boring include saving a favorite podcast or show for treadmill time, facing a window, using a scenic route, or dividing an easy session into short check-ins for posture and breathing. Keep entertainment quiet enough to hear new belt or motor sounds, and position every screen so the essential controls stay visible.
Variation does not need to mean a hard workout. Change the soundtrack, the view, the duration, or a modest incline on a day when balance feels secure. This treadmill guide for beginners deliberately avoids prescribing a training plan: the first useful goal is a setup and routine you can return to without dread, confusion, or a negotiation with twenty flashing buttons.
Keep the treadmill predictable and safe
Clean and inspect without guessing
After use, switch the machine off and wipe sweat from the console, rails, and permitted exterior surfaces with the method in the manual. Keep liquid out of openings and never spray cleaner directly toward electronics. With the treadmill unplugged and the belt still, look for fraying, cuts, loose parts, debris, or a belt that no longer sits roughly centered.
If the walking belt drifts toward one side, do not improvise with equal turns or a universal number of bolt rotations. Follow the exact model-specific procedure for centering a treadmill belt safely, including the stated adjustment direction, increment, and test method. Overtightening can create a different problem while trying to solve the first one.
Treat lubrication as a model-specific task
There is no reliable universal lubrication calendar. Some manufacturers specify time, operating hours, or distance; some use pretreated, waxed, lubricant-infused, or technician-serviced systems. Check the model-specific lubrication requirements before applying anything. Use only the lubricant, amount, location, and process stated for that machine—never WD-40, household oil, or a product chosen only because the label says “treadmill.”
Heat, noise, hesitation, or a dry-feeling deck are reasons to inspect the machine, not proof that lubrication is the cure. Excess or incorrect lubricant can contaminate the belt, deck, rollers, or floor. If the manual is unclear, contact the manufacturer or a qualified technician rather than conducting a kitchen experiment under a moving belt.
Separate drifting, slipping, and stopping
A belt that moves toward one side is drifting. A belt that hesitates or briefly slows underfoot while the machine remains powered is slipping. A belt or whole machine that stops unexpectedly is a separate fault. The symptoms may overlap in casual conversation, but the safe response begins by naming what actually happened.
If the belt slips or hesitates underfoot, end the session without jumping from the moving belt. Once it is stopped, switch off and unplug before any visual inspection. Do not assume the belt simply needs tightening or lubricant; wear, contamination, alignment, tension, deck friction, rollers, or the drive system may be involved. Stop using it if slipping persists or if the belt or deck is damaged.
When the treadmill stops while running, first regain balance and end the workout. Then distinguish complete power loss from a lit console with a stopped belt, a displaced safety key, a normal programmed pause, or slipping that only felt like a stop. Do not open electrical covers, bypass the key, repeatedly reset a tripping breaker, or test a repair by running.
Leave the treadmill unplugged and arrange qualified service for repeated shutdowns, persistent slipping, a damaged cord or belt, burning smells, sparks, unusual heat, grinding, banging, a straining motor, or an error you cannot resolve from the manual.
- Clear the belt and rear landing area.
- Clip the safety key and start from the side rails.
- Stop when your body or the machine feels wrong.
Once you know how to use a treadmill, a good session begins to look pleasantly uneventful: the space is clear, the controls are familiar, the pace is manageable, and stopping never feels like failure. Keep the owner’s manual close, repeat the same quick pre-run checks, and let consistency grow from confidence rather than haste.
Those simple treadmill maintenance basics protect more than the machine. They protect the next step – and the person taking it.
